A conversion tracking setup consists of three essential components: Google Tag Manager, Google Analytics, and your website platform itself. The site platform is also referred to as a content management system, or CMS.
These platforms work together starting with Google Tag Manager, wherein you create tags, which fire off when a trigger is, ahem, triggered by a user completing its associated action while on your site. Both the tag and the trigger is something you create and apply. The “event” corresponding to this tag is created in Google Analytics and registers this information received from Tag Manager. When it comes time to connect your advertising in Google Ads directly to Google Analytics, it will pull these events as conversion goals to be viewed in your Ads platform.
Once all platforms are connected, this allows you to track actions on your site, including, crucially, the core goals of any advertising campaign. Common examples include a purchase or sign up. More or less any action can be tracked, such as clicks, scroll depth, views for a certain page, time spent on a page, and tons of others.
These insights help you better understand which keywords and general marketing approaches are performing well, plus it lets you assess costs associated with users completing a given action.
The other side of this is that, when tags aren’t firing correctly, you’re not capturing or attributing the information necessary to learn these things. For that reason of course, it’s important to be sure they are, and for that to happen it’s important to test them on occasion.
Here’s how to do that:
Testing tag fires
When it comes to tags and triggering them, Google Tag Manager — GTM for short — is the industry standard platform. As long as it’s been placed on your site’s backend, you can use GTM’s debugger tool, which allows you to test tag fires in real time of actions users could take on your site.
Now, many marketers prefer a multi-display setup, and we feel this is quite helpful for this task to help you visualize everything clearly.
For the purposes of this instruction, we’re assuming a general working knowledge of Google Tag Manager [1] and that this is in a scenario where a tag has been already created and paired with a corresponding event in Google Analytics. In this example, let’s suppose we’re tracking clicks to call a phone number on your site. Step-by-step, it’s as follows:
- Open Google Tag Manager in one window, click where it says “debugger,” and it will open the site directly in a new window.
- From there, check the event parameters for the tag you’re testing. Do these variables — category, action, label, and value — match exactly with their corresponding Google Analytics event?
- Click on your desired action variable.
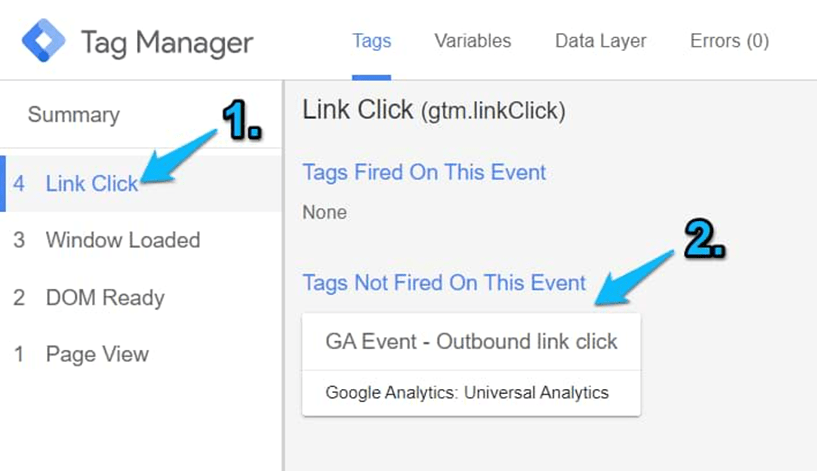
- Over in the debugger window, under the left-hand sidebar’s “summary tab,” you’ll see the trigger fire correctly or otherwise. If it doesn’t, the tag trigger was created incorrectly.
If you’ve got a case of the tag trigger not working — remember, this hypothetical scenario is tracking phone number clicks — you’ll want to double-check that you added the correct phone number as click text in the trigger. To do this, you’ll:
- Click the latest process in the debugger’s page load dropdown. This may be listed as “link click.”
- Click “variables,” then search for what is listed under CLICK TEXT.
- This is where whatever is displayed for CLICK TEXT is exactly what is inputted as the trigger variable. This is case sensitive, and also may include parentheses or dashes in the phone number.
- Continue on with your test by disconnecting from the debugger window.
- With the trigger adjusted, publish the Google Tag Manager workspace changes to the site.
- Reconnect to the debugger and complete the action again to confirm it’s working.
Some best practices worth noticing: In this example, a trigger variable of CLICK TEXT can be used with the text containing the phone number. And if we’re tracking clicks on that number from a specific page on your site, we can further add a URL CONTAINS filter, wherein there’s a portion of that page’s distinct URL to distinguish it from others.
Of course the specific details of this troubleshooting process will differ depending on the tag and trigger you’re testing. Luckily, though, the general process remains the same. If you notice outliers in your tracking data or anything that doesn’t seem right, don’t hesitate to test these issues — the longer you wait, the more insights you’re missing out on!